


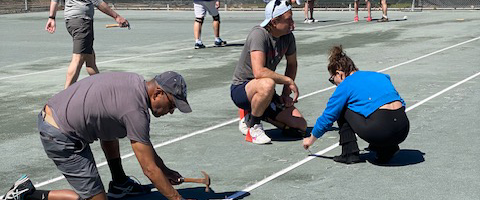
Measurements for Tape Installation
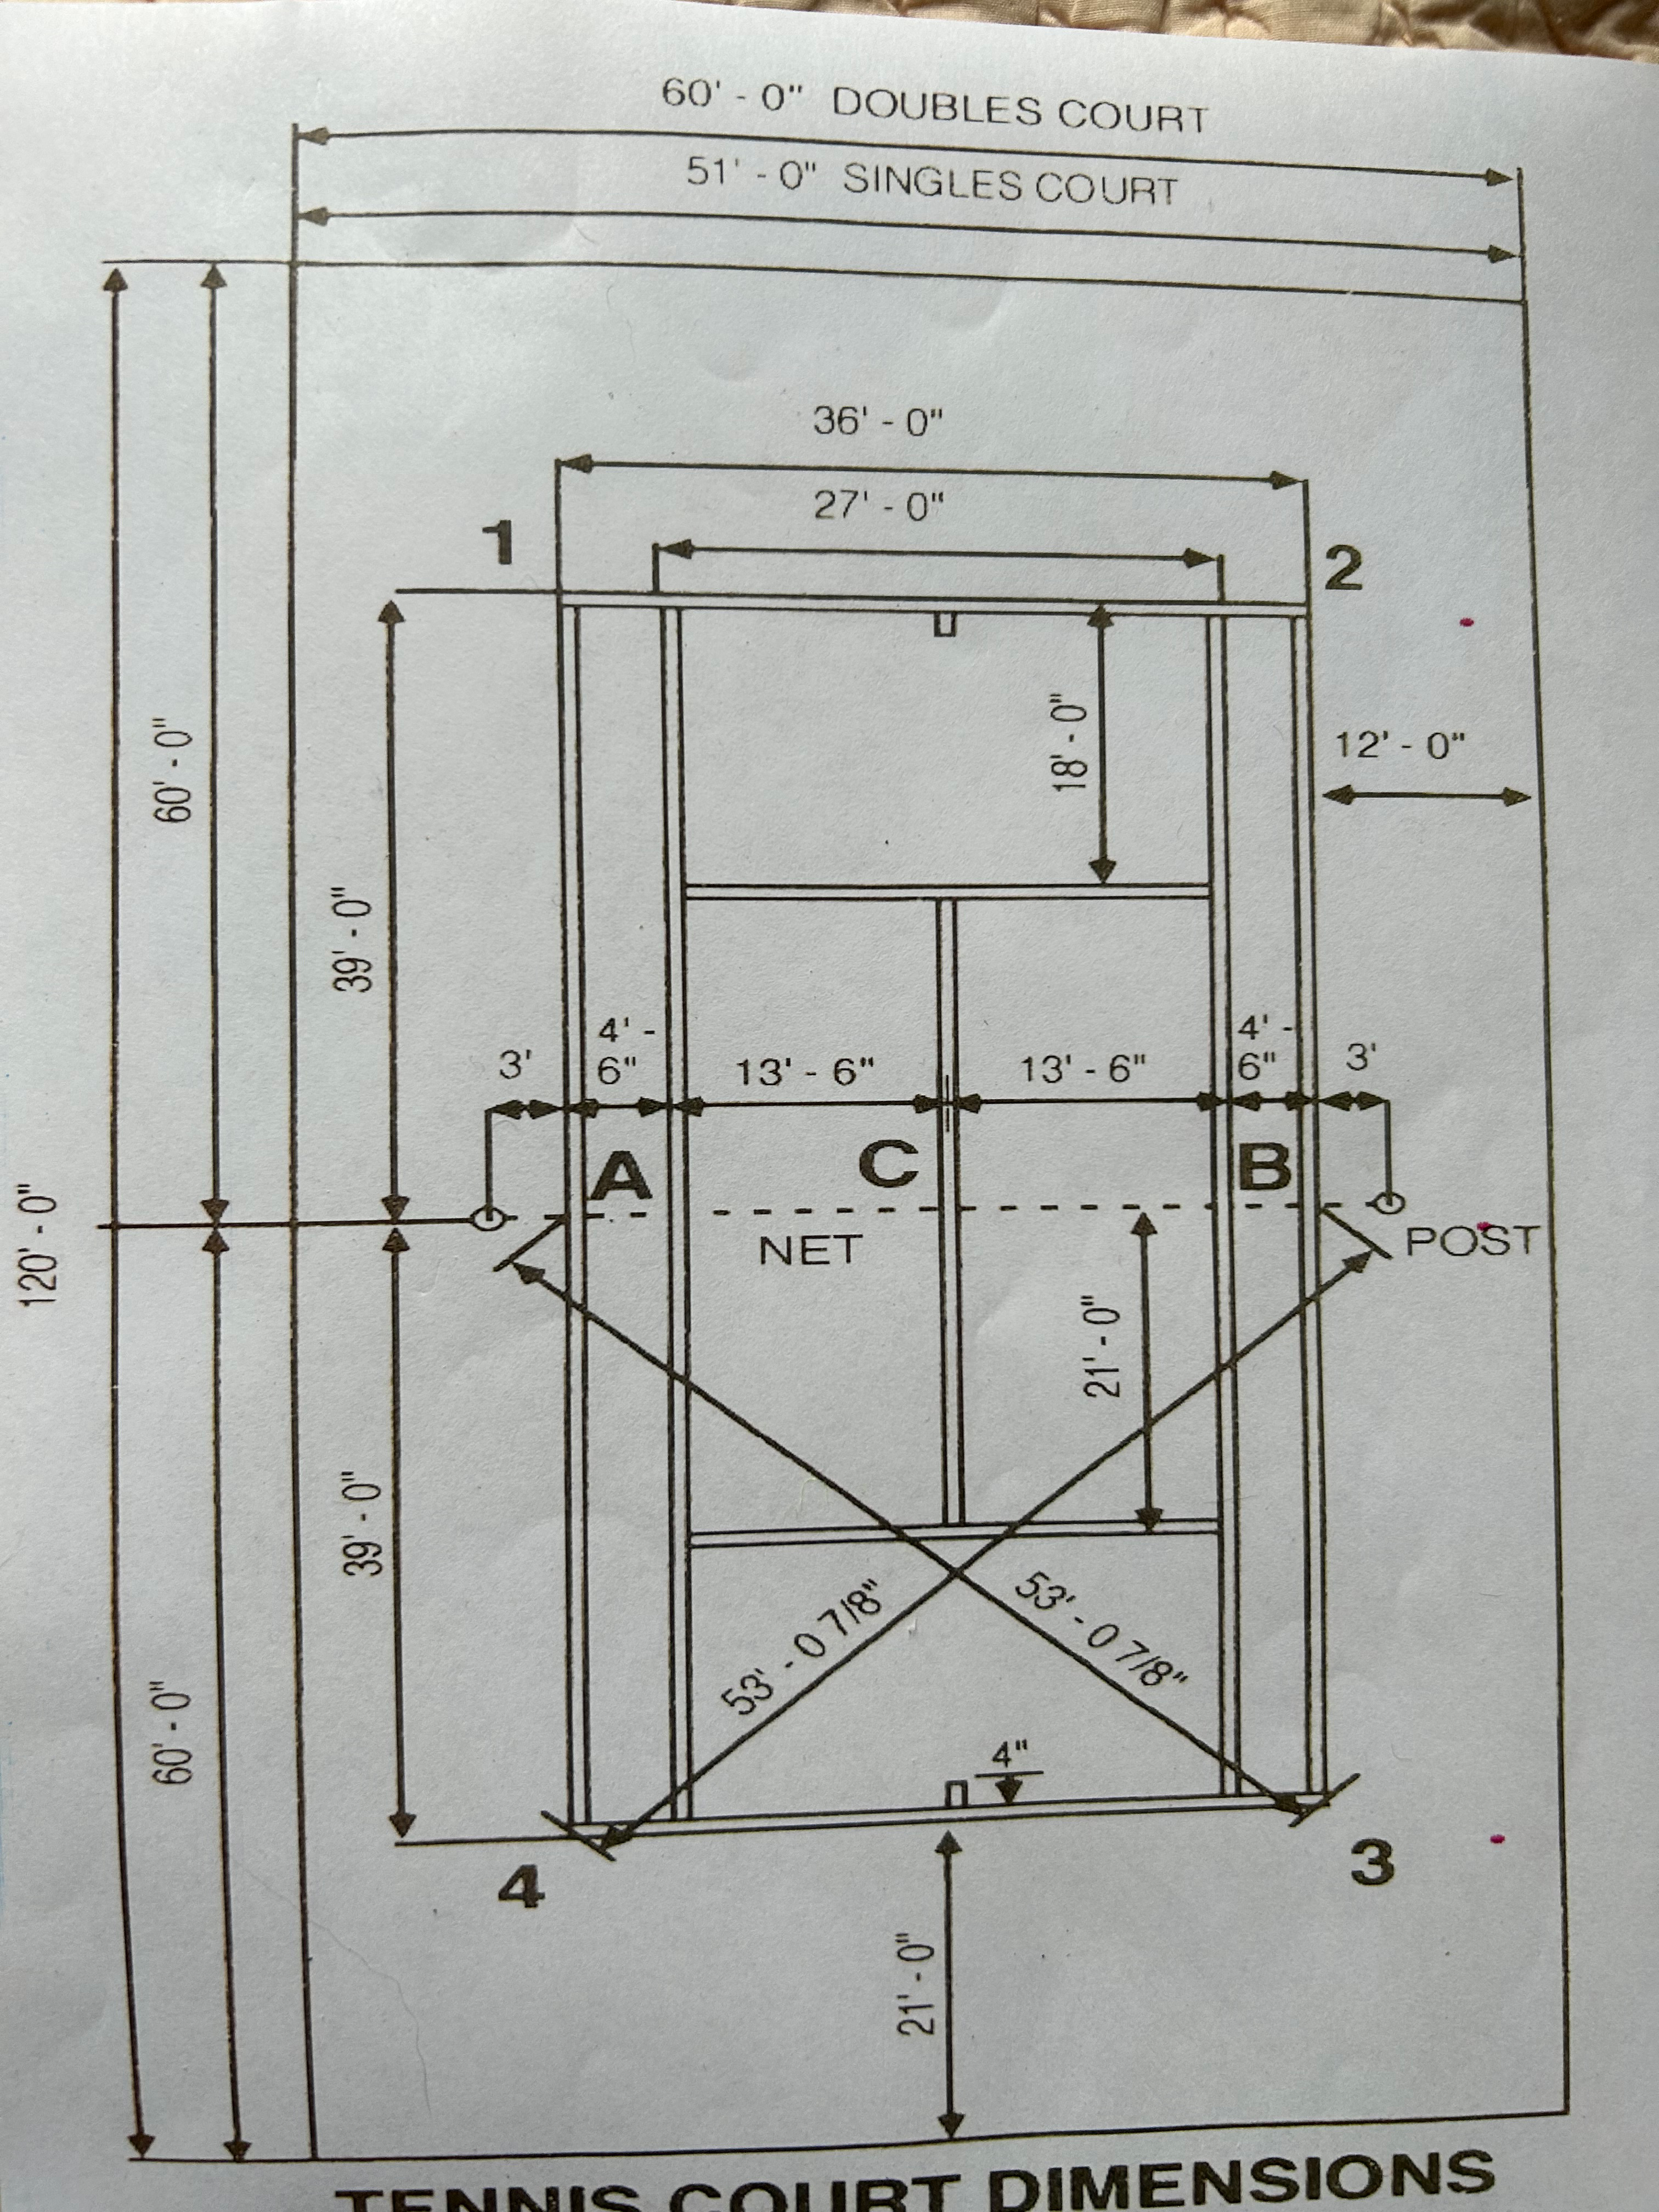
Quick Instructions:
1. Establish the outside corners
a. A is 3' from post center. It is the outside of outside line.
b. From A, measure 39' and draw a line in the clay at 4
c. From B on opposite post, measure 53' 0 7/8" and draw a crossing line in the clay
d. The intersection of the crossing lines is your corner.
e. Repeat for all corners.
2. Clear the clay away from a strip between 1 and 4. Use the line sweeper after using the rake.
3. Run a mason string from 1 to 4. Anchor the mason string 3 feet and at an angle from the nail in the corners of 1 and 4.
4. Run the tape from 1 to 4 leaving 3 feet of extra tape on both ends. Align the tape with the string.
5. Anchor the tape at 1 by sinking nails in the extra tape beyond the corner. Be sure that the tape stays flush with the string as you anchor the tape.
6. At 4, pull the tape taught (pull hard) and have another person anchor the tape by sinking nails in the extra tape area beyond the corner. Be sure that the tape stays flush with the string as you anchor the tape.
7. At 1, begin sinking nails in the tape by straddling the tape with a knee on either side. Leave 1/2 inch of nail sticking up above the tape (do not sink the nails flush with the tape). Make sure to keep the tape flush with the mason string as you go. It is helpful to sprinkle nails along tape on the side that is your dominant hand. This keeps you from having to reach for nails as you go.
8. Once you are finished sinking nails into the tape, drive the roller over the nails to fully sink them.
9. Repeat for all lines.